
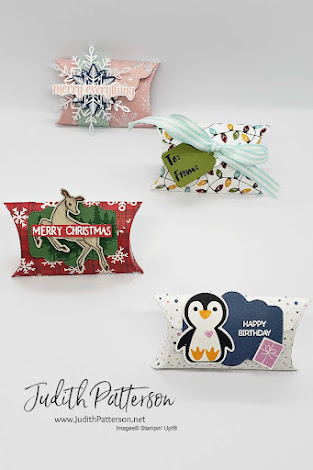
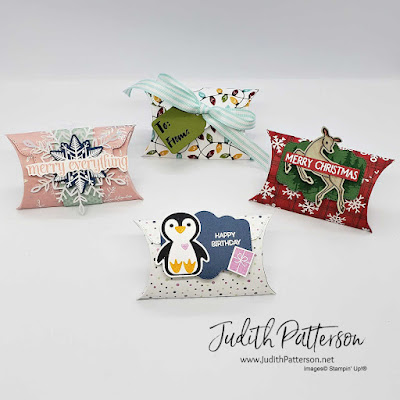
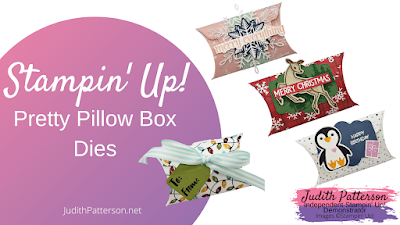
Hello & Welcome! I have been playing around with Stampin' Up!'s Pretty Pillow Box Dies and love them! So far, I have only been creating pillow boxes with Designer Series Papers, which makes beautiful boxes on the inside as well as out! It also makes creating boxes fast and easy. I will quickly run through how to make each of these boxes here. You can also scroll to the bottom of this post for a link to my YouTube video where I demonstrate how to make a simple pillow box!
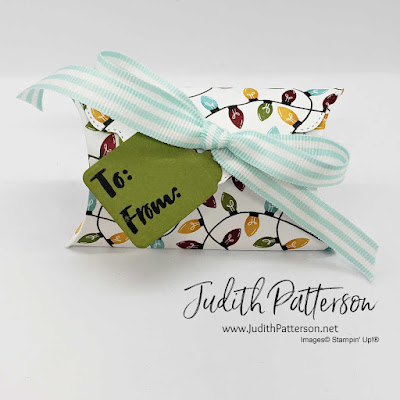
This first one is the one I demonstrate in my YouTube video. It really was quick to make. After I die cut the box and assembled it, I stamped the 'To & From' on a scrap of Old Olive Cardstock and die cut it (with another die from the Pretty Pillow Box Dies).
I finished by tying it closed this pretty Pool Party Striped Ribbon.
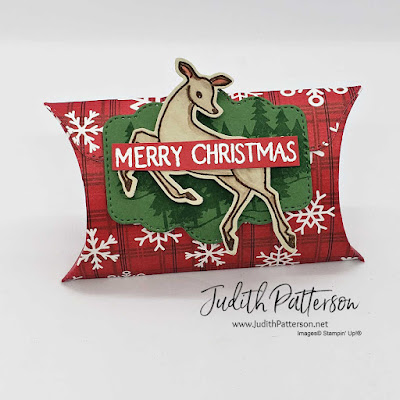
For this one, I stamped the trees from the Peaceful Deer stamps on a scrap of Garden Green Cardstock, with Garden Green ink. I did overlap some of the trees. Then, I stamped the deer on Soft Suede Cardstock with Early Espresso ink. I used Blender Pens with Flirty Flamingo & Early Espresso inks to color the deer. I heat embossed 'Merry Christmas'. Once everything was stamped, I used Pretty Pillow Box Dies to cut out the box and tree piece. I used the Deer Builder Punch to punch out the deer. 'Merry Christmas' was just trimmed around with Paper Snips. I used Liquid Glue to assemble the box, to attach the Garden Green Tree piece to the front of the box and to attach 'Merry Christmas' to the deer. I used Stampin' Dimensionals to attach the deer to the box flap and to attach the flap closed.
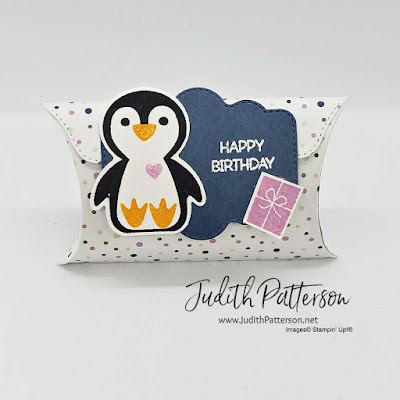
This is another one that was pretty quick! I stamped the penguin and punched him out. Then, I stamped the gift and fussy cut around it. After heat embossing 'happy birthday', I used the Pretty Pillow Box Dies to cut out the Misty Moonlight piece and the pillow box. I used Liquid Glue to assemble everything and a Stampin' Dimensional on the flap to seal it closed.
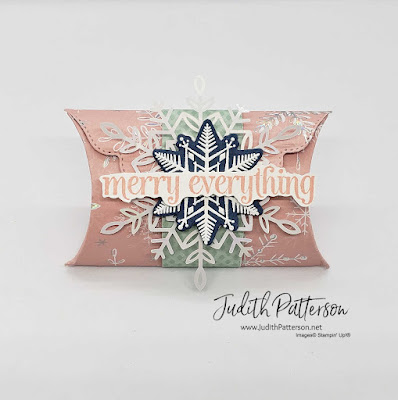
This one might be my favorite. I adore this Whimsy & Wonder Specialty Designer Series Paper. To close this one, I decided to wrap a belly band (measuring 1" x 5-1/4") around it. The large snowflake is a die cut piece from Wonderful Snowflakes. I heat embossed the smaller snowflake on Misty Moonlight Cardstock and used Stitched Snowflakes Dies to cut it out. 'Merry Everything' was stamped with Blushing Bride ink, then fussy cut around. I used Liquid Glue to assemble the box and the band. Everything else was attached using Glue Dots.
I hope you enjoyed these boxes!
Please contact me if you have any questions.
If you live in the USA and don't have a Demonstrator I would love to send you our catalogs, or, even better, have you Join my team!
You can also click the link at the top of my blog to sign up for my newsletter.
Of course, if you just want to shop, you can click any of the product links at the bottom of this post, or SHOP button across the top of my blog, or the host code on the right side of this page.
I would L♥VE to be your Stampin' Up! Demonstrator!
Click on the picture below to watch my YouTube Video showing you how to make this card.
Happy stamping!

It's time to Sale-a-brate!
Sale-a-bration is one of Stampin' Up!'s biggest promotions of the year.
During Sale-a-bration, you can earn exclusive products for FREE!
For every $50 you spend, you can add your pick of Sale-a-bration products to your cart at no additional cost.
SALE-A-BRATION ENDS THURSDAY!!


PRODUCT LIST
(Please use the current Host Code, found in the top right corner of my blog, on orders under $150)
No comments:
Post a Comment