Monday, January 31, 2022

Stampin' Up! Hello Beautiful ~ Crafty Challenge Blog Hop


Hello and welcome to my blog!  Today I'm joining the Crafty Collaborations Crafty Challenge Blog Hop!  We are a group of Stampin' Up! Demonstrators from around the world who love to create, then share and hopefully inspire to others!  

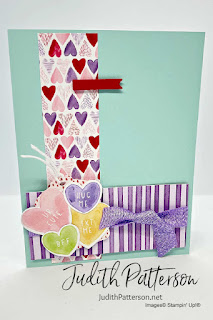
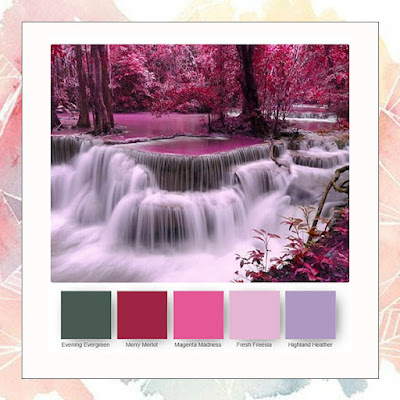
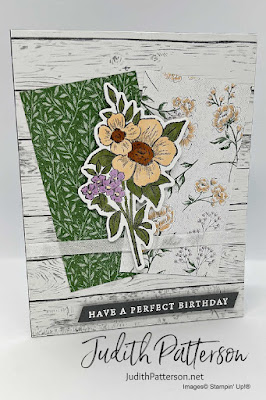
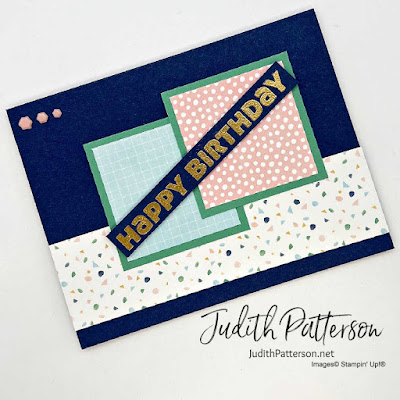
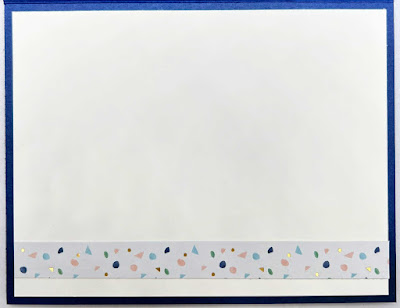
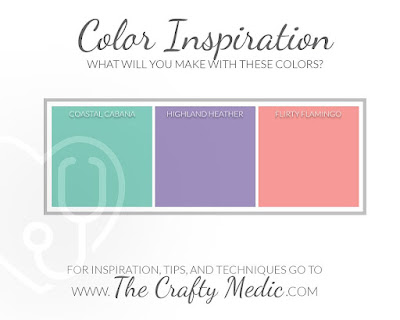
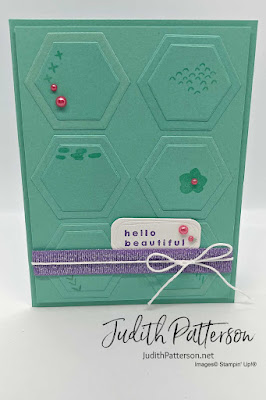
Our challenge this month was to create using these three colors!  Of course, I couldn't resist this challenge because these are three of my very favorite Stampin' Up! Colors!  Aren't they beautiful!?

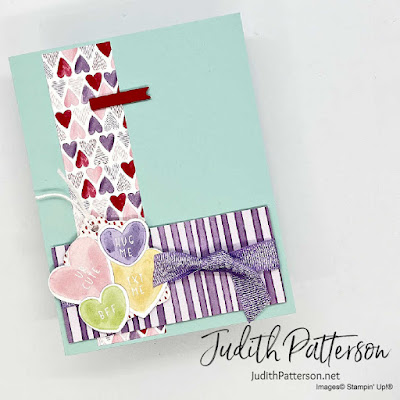
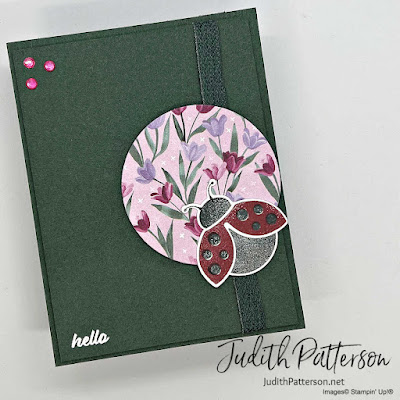
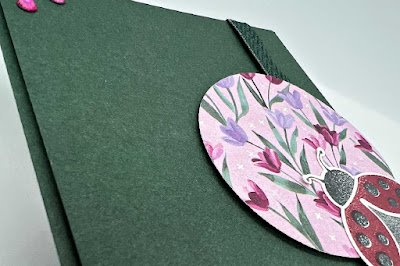
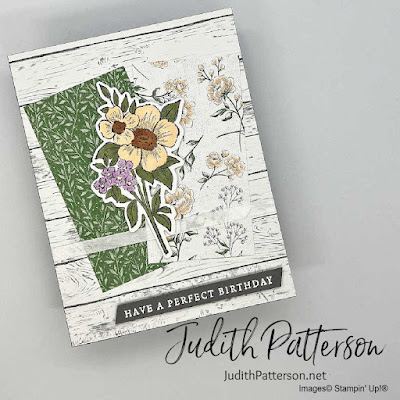
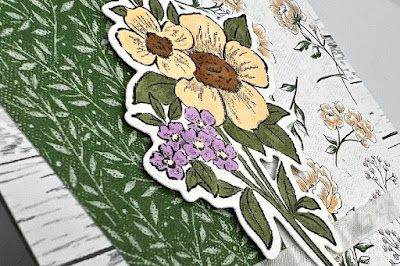
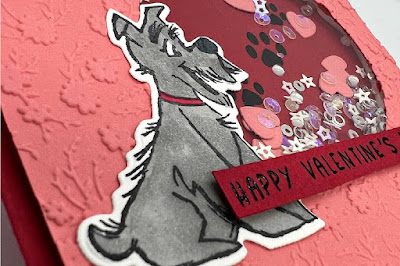
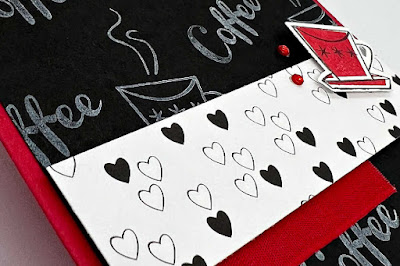
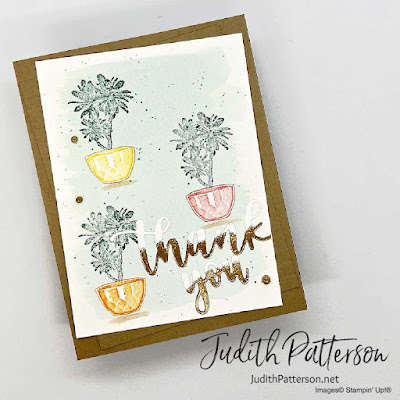
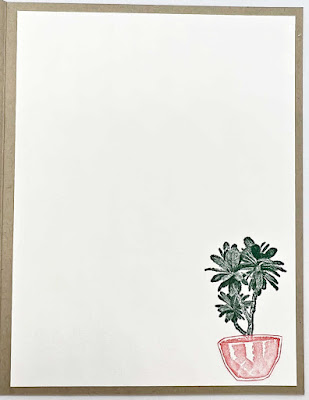
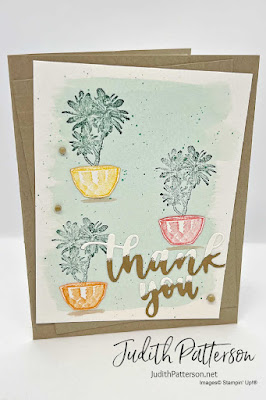
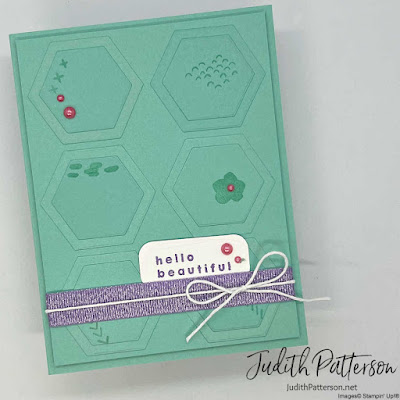
I chose the Hello Beautiful Bundle to create with, mostly because I've been wanting to use it and haven't had the chance yet!  Also because I thought these would be fun colors to use with this bundle.  


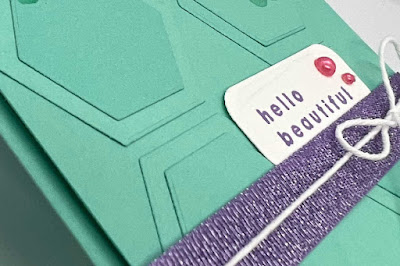
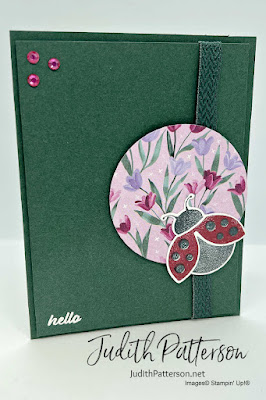
I decided to add a touch of Flirty Flamingo to my card by using the Dark Flirty Flamingo Stampin' Blend to color a few Basic Pearl Jewels. I recommend coloring the pearls first so they have a minute to dry completely before you use them. 


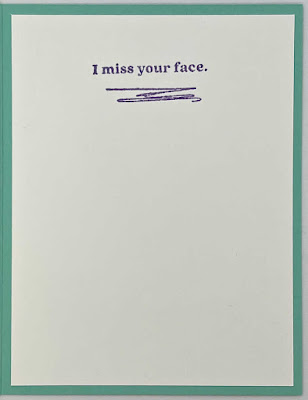
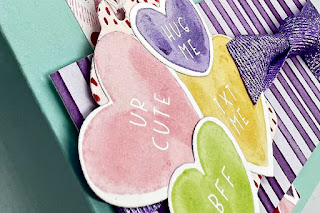
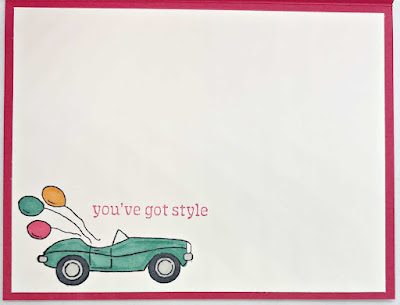
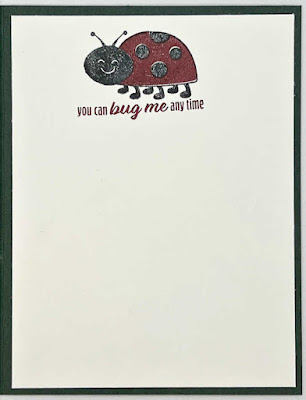
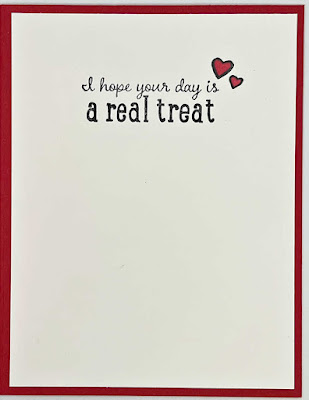
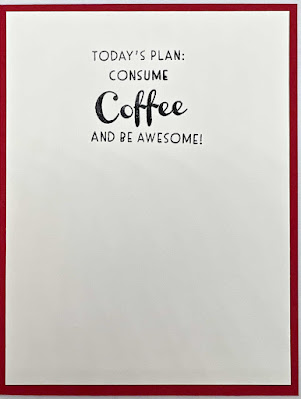
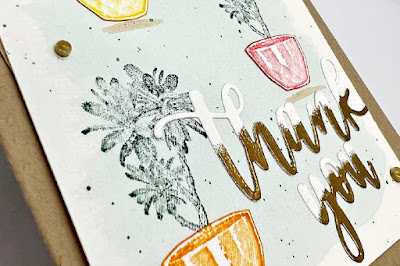
The sentiments in this set are great, and most are not ones you see often in other stamp sets!  The fonts are perfect and they are sized to fit just right in the coordinating dies. 


Thanks so much for stopping by my blog.  I hope you are inspired to create soon!  Don't forget to use the links below to see what everyone else chose to do with these beautiful colors. 
Happy Stamping!

BLOG HOP

PRODUCT LIST


Saturday, January 29, 2022

Stampin' Up! Sweet Conversations card ~ Sketch Saturday


Hello and welcome to my blog.  Today's card was inspired by Sketch #693 from Sketch Saturday.  This challenge will run a week if you would like to join the challenge!  Need more inspiration?  Look back at the previous sketches to see what spurs that creativity! 


I surprised myself with this sketch.  It wasn't until after I edited my photos that I realized I did not stamp at all on this card!  Craziness.  This Sweet Talk Designer Series Paper did all the work on this card!  And the amazing, coordinating Sweet Hearts Dies, which I used to cut out the hearts (from the Designer Series Paper), as well as the tag and the banner.  


MEASUREMENTS
Card Base ~ Pool Party Cardstock ~ 8-1/2" x 5-1/2", score at 4-1/4"
Layer 1 ~ Sweet Talk Designer Series Paper ~ 1-1/4" x 5-3/8"
Layer 2 ~ Sweet Talk Designer Series Paper ~ 1-3/4" x 4"
tiny scrap of Real Red Cardstock
Small pieces of Sweet Talk DSP to die cut
Inside Layer ~ Basic White Cardstock ~ 4" x 5-1/4"


I couldn't resist adding one more heart, also die cut from the Sweet Talk DSP,  to the inside of the card!


Thank you for visiting my blog today.
Happy Stamping!

PRODUCT LIST
Click on any of the photos below to go straight to that item in my online store.
During the month of January 2022, please use Host Code QNB6WK39 on orders under $150.  
Thank you!


Friday, January 28, 2022

Stampin' Up! Driving By ~ Card from the Catalog


This week's Card from the Catalog can be found on p. 7 of the 2022 Jan-Feb Sale-a-bration Brochure.  The smaller card is from the catalog, and the other is just another version of the same card with different colors, a larger size and a couple of other small changes.  There is a link to my YouTube video at the bottom of this post.  In the video I show you how to make the notecard. :)  The measurements and instructions in this post are for the larger card. 

   This is such a fun stamp set, with these classic cars and fun sentiments.  I can't decide which car (or card) is my favorite.  Do you have a favorite?  


MEASUREMENTS
Card Base ~ Melon Mambo Cardstock ~ 8-1/2" x 5-1/2", score at 4-1/4"
Layer 1 ~ Melon Mambo Cardstock ~ 4" x 5-1/4"
Layer 2 ~ Polished Pink Cardstock ~ 2-1/2" x 4"
scraps of Basic White
Inside Layer ~ Basic White Cardstock ~ 4" x 5-1/4"

  • Use a Post-it note to cover the balloons on the stamp before inking it with Polished Pink ink.  Remove the balloons, then stamp the car on Layer 2, as shown.  Repeat two more times. 
  • Stamp the car & balloons with Tuxedo Black Memento Ink on a scrap of Basic White Cardstock.  Color with Stampin' Blends, then fussy cut around the car & balloons.
  • Emboss Layer 1 with the Splatters 3D Embossing Folder. (it won't emboss the entire piece, but that's okay, because the other side will be covered up)
  • Stamp the sentiment with Polished Pink ink, then fussy cut around it. 
  • Use Liquid Glue (or Stampin' Seal) to adhere Layer 1 to the Card Base.  Then, adhere Layer 2 to Layer 1. 
  • Attach the sentiment and car with Stampin' Dimensionals, as shown. 
  • Finish by adding a few In Color Jewels.

For the inside, I decided to stamp the car in Tuxedo Black and color it to (mostly) match the one on the front.  I also stamped another sentiment with Polished Pink Ink. 


I hope you enjoyed this card from the catalog.  Let me know if you have any questions, or if there is a card from one of Stampin' Up!'s current catalogs that you would like to see made on my Friday YouTube Video.

Happy Stamping! 


When you place an order subtotaling $50 you can choose a FREE Sale-a-bration item, like this Driving By stamp set, to add to your order!  On $100 orders, you can choose TWO FREE with $50 purchase items or one Free with $100 purchase item! Take advantage of this awesome special today!

PRODUCT LIST
Click on any of the photos below to go straight to that item in my online store.
During the month of January 2022, please use Host Code QNB6WK39 on orders under $150.  
Thank you!


Thursday, January 27, 2022

Stampin' Up! Hello Ladybug ~ Ink & Inspiration Blog Hop


hello.  Today I am excited to be part of the Ink & Inspiration Blog Hop!  Our challenge this time was to create a card using the photo below as our inspiration.  We had the choice of using the colors, the photo or both!  I chose to just use the colors as my inspiration.  I'm looking forward to seeing what everyone else did with this challenge! 


I started by cutting a circle of Flowering Fields Designer Series Paper with one of the Layering Circles Dies.  I chose this paper as my starting point because it already had three of the colors in it...Evening Evergreen, Fresh Freesia, and Highland Heather.  At first I thought it also had a 4th color, Merry Merlot, but then I realized that's actually Rich Razzleberry...oops. 


I had the hardest time trying to figure out how to add the Magenta Madness to this card.  I accomplished this by using the dark Magenta Madness Stampin' Blend to color a few Basic Rhinestones.  Then, I added those in the upper corner. 


Isn't this cute!?  I love the little ladybug with the 'you can bug me any time' sentiment.  Such fun!


Thanks for reading my post!  Don't forget to visit the other blogs listed below to learn about everyone else's favorite Stampin' Up! products!

Happy Stamping! 

Blog Hop List

Product List
Click on any of the photos below to go straight to that item in my online store.
During the month of January 2022, please use Host Code QNB6WK39 on orders under $150.  
Thank you!

Wednesday, January 26, 2022

Stampin' Up! Blessings of Home Birthday Card


Hello!  Are you having a wonderful Wednesday!?  I had an exciting beginning to my day.  We went to the Ft Worth Stock with my husband's parents and a close friend.  Thankfully I have been blessed with amazing in-laws and we always have a great time when going on our little adventures!  Of course, we ended our little day trip with some yummy Mexican food on the way home.

Today's card was inspired by this double challenge from Double Trouble Paper Crafting and Try Stampin' On Tuesday.  The sketch is from TSOT.  Double Trouble added the challenge of using three different patterned papers and a bonus challenge to add a penguin.  (I totally didn't see that bonus challenge until AFTER I made my card...oops)  I did not know about Double Trouble's blog until this challenge...I plan on keeping an eye on it for future challenges! 


MEASUREMENTS
Card Base ~ Basic Gray Cardstock ~ 8-1/2" x 5-1/2", score at 4-1/4"
Layer 1 ~ Heart & Home Designer Series Paper ~ 4-1/4" x 5-1/2"
Layer 2 ~ Heart & Home Designer Series Paper ~ 2" x 3-3/4" (*2)
Scrap of Basic White Cardstock
Scrap of Basic Gray Cardstock 
Inside Layer ~ Basic White Cardstock ~ 4" x 5-1/4"

  • Stamp the flowers with Tuxedo Black Memento Ink then color with Stampin' Blends
  • Cut out the flower with the coordinating die from Flowers of Home Dies. 
  • Adhere the two Layer 2 pieces to Layer 1 with Liquid Glue or Stampin' Seal, as shown.  
  • Place a Glue Dot on each end of the ribbon, then attach the ends behind Layer 1. 
  • Adhere Layer 1 to the Card Base with your favorite adhesive. 
  • Attach the flowers with Stampin' Dimensionals
  • Use Versamark to stamp the sentiment on a scrap of Basic White CS.  Cover with white embossing powder and set with the heat tool. 
  • Trim around the sentiment, then attach it with Mini Stampin' Dimensionals, as shown.

Stamp the flowers in the lower left corner of the Inside Layer, as shown.  Color the flowers to match the front.  Then, adhere the Inside Layer to the inside of the card. 


Thank you for stopping by my blog today! I hope this card inspires you to create!
Please contact me if you have any questions.
If you live in the USA and don't have a Demonstrator I would love to send you a catalog & Sale-a-bration brochure.  (You can also download copies of the current catalogs with the links in the sidebar of my blog)
I would L♥VE to be your Stampin' Up! Demonstrator!

Happy Stamping!

PRODUCT LIST
Click on any of the photos below to go straight to that item in my online store.
During the month of January 2022, please use Host Code QNB6WK39 on orders under $150.  
Thank you!


Tuesday, January 25, 2022

Stampin' Up! Pampered Pets Shaker Card


Hello!  Welcome to my blog.  Today I'm sharing with you a fun shaker card, easy to create, featuring Stampin' Up!'s Pampered Pets stamps!  I had fun using different products to create this card.  For instance, the Ornate Floral 3D Embossing Folder on the Flirty Flamingo Cardstock is a new favorite!  I find myself wanting to use it on every card.  


The fun shaker pieces are from the Sparkle & Shine Sequins Assortment.  This might be my favorite sequin assortment yet.  I love the different shapes and finishes in this assortment.  I added to it by die cutting a few hearts using the Sweet Conversations Dies.  Plus, I used the Pets Dies to cut out a few paw prints, then glued them to the Card Base, so they are behind all the shaker bits!  


All things considered, this card really doesn't take long to make, and is just so much fun!  You could easily use a different sentiment and colors to make this something other than a Valentine's card...if that would suit your needs better. 


I hope you are inspired by this card!  Do you prefer to watch video tutorials?  
You can see one for this card here ~ 


Thanks again for taking time out of your day to visit my blog.  I hope you have a very blessed week!
Happy Stamping!


Would you like a chance to earn this Host Set, and other exclusive Sale-a-bration items FREE?
I would be happy to help you with an online Stampin' Up! Party via Facebook or Zoom!
Contact me here with any questions or to schedule a party today.
Don't wait too long...Sale-a-bration ends February 28th, 2022.

PRODUCT LIST
Click on any of the photos below to go straight to that item in my online store.
During the month of January 2022, please use Host Code QNB6WK39 on orders under $150.  
Thank you!


Monday, January 24, 2022

Stampin' Up! Nothing's Better Than card


I love any excuse to use Stampin' Up!'s Nothing's Better Than stamp set!  I'm not a coffee drinker myself, but do love a great mug of hot tea.  My absolute favorite is Chocolate Mint from Harney & Sons Tea, so yummy!  I often use the chocolate or cookies stamps from this same set, because I can't live with those!  However, it depends on who I am making a card for, and this one is going to a coffee lover!  (This set also comes with cocktail stamps, which I use occasionally!)

This card was inspired by this sketch and photo inspiration for those great stampers over at Fusion Card Challenge.  If you are ever stuck for inspiration, their blog is a great one to check out!  This challenge has some time left on it, so join if you can.  :)  


MEASUREMENTS
Card Base ~ Real Red Cardstock ~ 8-1/2" x 5-1/2", score at 4-1/4"
Layer 1 ~ Basic Black Cardstock ~ 4" x 5-1/4"
Layer 2 ~ All Together DSP* ~ 1" x 4"
scrap of Basic White Cardstock
Inside Layer ~ Basic White Cardstock ~ 4" x 5-1/4"

*All Together 6"x6" Designer Series Paper will not be available to customers until February 1, 2022. 

  • Use Whisper White Craft Ink to stamp the coffee mug, steam and 'coffee' all over Layer 1 
  • Clean your coffee mug stamp, then use it to stamp on the scrap of Basic White Cardstock with Tuxedo Black Memento Ink.  Use the coordinating mug stamp to stamp the inside of the mug with Real Read Ink. 
  • Cut around the mug with the coordinating Love You More Than Dies. 
  • Adhere Layer 1 to the card base with Liquid Glue or Stampin' Seal.
  • Attach a 2-1/4" piece of Real Red Faux Linen Ribbon with a piece of Tear & Tape
  • Use Stampin' Dimensionals to attach Layer 2, slightly covering the top of the ribbon, as shown.
  • Add the die cut mug with another Dimensional.
  • Finish by adding a few Red Rhinestones around the mug 

For the inside, stamp the sentiment of your choice.  Personally, I love this one, especially when finished with 'and be awesome!'


Thank you for stopping by my blog today! I hope this card inspires you to create!
Please contact me if you have any questions.
If you live in the USA and don't have a Demonstrator I would love to send you a catalog & Sale-a-bration brochure.  (You can also download copies of the current catalogs with the links in the sidebar of my blog)
I would L♥VE to be your Stampin' Up! Demonstrator!

Happy Stamping!


I recommend joining Stampin' Up! to anyone who has a long shopping list or enjoys hosting crafty days with their friends.  Purchasing a Stampin' Up! Starter Kit in the USA is $99 (+S&H, tax) and you get to pick up to $125 in Stampin' Up! product from the Mini and/or Annual Catalogs.  Plus, during Sale-a-bration you can choose two FREE stamp sets!  Once you are a demonstrator you will enjoy a 20% discount, get to prepurchase some products, get sneak peeks at new catalogs, and be able to join demonstrator only Facebook groups that are full of creative inspiration and encouragement.  I would be happy to answer any questions you may have and would love you have you my team!

PRODUCT LIST
Click on any of the photos below to go straight to that item in my online store.
During the month of January 2022, please use Host Code QNB6WK39 on orders under $150.  
Thank you!


Saturday, January 22, 2022

Stampin' Up! Slim Sayings Card


I was excited to open up my new Abstract Beauty 4"x6" Specialty Designer Series Paper today to create this card.  This SDSP has fun designs and beautiful colors that are easy to mix and match.  One side of each piece includes gold foil in the design (which is what makes it 'specialty' DSP), the other side does not.  


I'm having a bit of a creative block today.  Thankfully, I was still able to create a card with this fun DSP and a sketch from Simply Sketchin' Saturday, which is a Facebook Group for card makers.  Sometimes my brain gets stuck in literal mode, and I have a hard time thinking outside of the box...today seems to be one of those days.  It's days like this I am extra thankful for great sketches and coordinating Stampin' Up! products!


MEASUREMENTS
Card Base ~ Night of Navy Cardstock ~ 8-1/2" x 5-1/2", score at 4-1/4"
Layer 1 ~ Abstract Beauty SDSP ~ 1-1/2" x 5-1/2"
Layer 2 ~ Just Jade Cardstock ~ 2-1/4" x 2-1/4" (*2)
Layer 3 ~ Abstract Beauty SDSP ~ 2 " x 2" (*2)
Layer 4 ~ scrap of Night of Navy Cardstock
Inside Layer 1 ~ Basic White Cardstock ~ 4" x 5-1/4"
Inside Layer 2 ~ Abstract Beauty SDSP ~ 1/2" x 5-1/4"

  • Stamp the sentiment with Versamark on the scrap of Night of Navy. Cover with Gold Embossing Powder and heat emboss.
  • Trim around the sentiment with the Paper Trimmer. 
  • Adhere Layers 1-3 to the front of the card, as shown, using Liquid Glue or Stampin' Seal
  • Attach the sentiment with Stampin' Dimensionals.
  • Finish the front by adding three of the Adhesive Backed Hexagons, one of each side. 

Adhere the inside layers together, as shown, then glue them to the inside of the card.  

Thank you for stopping by my blog today! I hope this card inspires you to create!
Please contact me if you have any questions.
If you live in the USA and don't have a Demonstrator I would love to send you a catalog & Sale-a-bration brochure.  (You can also download copies of the current catalogs with the links in the sidebar of my blog)
I would L♥VE to be your Stampin' Up! Demonstrator!

Happy Stamping!


When you order the Happy Hedgehogs Bundle and two sets of Stampin' Blends, you can get the exclusive Sunshine & Rainbow 6"x6" Designer Series Paper FREE during Sale-a-bration!  Take advantage of this awesome special today!

PRODUCT LIST


Friday, January 21, 2022

Stampin' Up! Island Vibes ~ Card from the Catalog


Happy Friday sweet stamper!  This week's card from the catalog is great one from the Sale-a-bration brochure, you can find it on p. 3.  It features Stampin' Up!'s exclusive stamp set, Island Vibes, which includes three terrific tropical images.  This is one of the Sale-a-bration items you can choose to add to your $50 order FREE during Jan/Feb 2022. (in the USA)


MEASUREMENTS
Card Base ~ Crumb Cake Cardstock ~ 8-1/2" x 5-1/2", score at 4-1/4"
Layer 1 ~ Crumb Cake Cardstock ~ 3-3/4" x 5"
Layer 2 ~ Fluid 100 Watercolor Paper ~ 3-3/4" x 5"
scraps of Basic White Cardstock 
Inside Layer ~ Basic White Cardstock ~ 4" x 5-1/4"


This card has lots of steps that gave me an opportunity to share some tips, tricks and techniques.  I've chosen not to type up the instructions for this one, but you can watch my short 30 minute YouTube tutorial to learn how to make this card.  I've added the video towards the end of this post.  At the very end, I've added all the fun supplies I used to make this card in a clickable shopping list. ;) 


I hope you enjoyed this card from the catalog.  Let me know if you have any questions, or if there is a card from one of Stampin' Up!'s current catalogs that you would like to see made on my Friday YouTube Video.

Happy Stamping! 


PRODUCT LIST
Click on any of the photos below to go straight to that item in my online store.
During the month of January 2022, please use Host Code QNB6WK39 on orders under $150.  
Thank you!